Tuesday, 27 May 2014

Easy Oreo Mint Chip Ice Cream Cake


Oreo Mint Chip Ice Cream Cake
I love the idea of serving ice cream in fun ways. And this one is just that.
A fun and easy no-bake mint chip ice cream cake!
Yum and yum! this is another recipe for Oreo lovers. baking is so much fun with these innovative ideas I enjoy it no matter even if I have to stand all day long cause the results are fruitful this is a easy recipe for all those who are ice cream lovers as well u can use any flavor u want but I am using mint.
I hope friends u r keeping tract of my blog keep me updated nd do send me your quaries I will b please to help
now towards the yummy recipe
Mint Oreos
And it doesn’t hurt that it’s stuffed with mint Oreo cookies either.
They’re in the crust, in the “cake” and on top too.
Want to make one?
Chopped Oreos
Okay good! First chop up some of the cookies for the crust.
Making Ice Cream Cake
Mix the crumbs with melted butter and then press into the bottom of a 7-inch springform pan. But first cover the bottom section of the pan with plastic wrap before securing the ring on top. It will make it easier to transfer the cake to a plate when you’re ready to serve.
Mint Chip Ice Cream
Time for the ice cream. You can use your favorite flavor. I’m going with mint chip today.
It’s not my fave…my first choice would be chocolate of course… but it’s a fun flavor for St. Patrick’s Day.
Ice cream layer
Spread a layer of ice cream on top of the cookie crust base.
Oreo Layer
Add in some oreos and then layer on more ice cream almost to the top edge of the pan.
Then layer on some whipped topping and place in the freezer for at least three hours.
Note: Next time I would break all the cookies into pieces to make the cake easier to cut.
Oreo Mint Chip Ice Cream Cake
When you are ready to serve, unclasp the springform ring to slide it off from around the cake.
Then just separate the plastic wrap from the base to serve.
Oreo Mint Chip Ice Cream Cake
Add some more oreos on top and you are ready to go.
Oreo Mint Chip Ice Cream Cake Slice
Just slice…
Oreo Mint Chip Ice Cream Cake Slice
And bite! Easy as pie… I mean ice cream cake!

Easy Oreo Mint Chip Ice Cream Cake

Servings: 1 7-inch ice cream cake

Ingredients

  • 30 Mint Oreos (1 package)
  • 2 Tbsp butter, melted
  • Plastic Wrap
  • 7-inch Springform Pan
  • 1.5 quart container Mint Chip Ice Cream, softened
  • 8 oz. container Cool Whip Topping, thawed

Instructions

  1. Crush 16 cookies in a food processor. Add melted butter and combine.
  2. Cover bottom section of springform pan with plastic wrap and secure ring in place.
  3. Press cookie crumbs into the bottom of prepared pan. Use the bottom of a glass to press the crumbs firmly in place.
  4. Chill pan in the refrigerator for 30 minutes.
  5. Remove and spread a layer of mint chip ice cream over the cookie base. Break seven Oreos into small pieces and place on top. Then layer more ice cream almost to the top edge of the pan. You'll have a little bit left over that you can enjoy straight from the box.
  6. Spread on a layer of whipped topping and place in the freezer for 3 hours. It helps to place your cake and serving plates in the freezer as well to keep the cake cold longer once you remove from the freezer.
  7. When ready to serve, unclasp the ring to remove it from the cake. Separate plastic wrap from bottom of cake and place on serving plate. Top with remaining 7 oreos. Cut into slices and serve right away. You can run a knife under hot water and wipe it dry to cut through the cake easily.
 

Kit Kat Cream Cheese Brownies


Kit Kat Cream Cheese Brownies
If you like your brownies rich then these are for you.
I’m talking chocolatey gooey goodness on the bottom, Kit Kat wafer bars in the middle and covered with a cheesecake topping to keep everything all cozy. em a kit kat lover and can eat it non stop when and this recipe is my best cause it full fills my desire of having kit kat in every bite. these brownies that I made were the best not only of kit kat but cream cheese was also adding a relishing affect to it.
friends I hope u r checking out my blog and enjoying all the recipes that I am sharing with you people. do practice them and keep me updated. your reviews are highly valued
Kit Kats
I wanted to make a Kit Kat cake the other day so I bought a bunch of candy bars. Then… I made the mistake of eating one. I put a package in the fridge because I like them cold with that extra little snap when you bite down. Then I did that again… thinking hey, I’ll just make a smaller cake. And then again… So needless to say a cake would not be happening. So I figured I needed to get rid of the rest of the candy bars before I ate them all by myself … so I thought I would hide them in a batch of brownies.
Kit Kat Cream Cheese Brownies
Because I can’t eat a whole batch right?! I’d totally have to share.
Brownie Batter
Look at that brownie batter.
Kit Kat Brownies
It makes a perfect bed for these bars to rest on.
Just tuck them in slightly.
Kit Kat Cream Cheese Brownies
Then they get covered up with a cream cheese topping.
And it all goes into the oven to bake until it comes out in a big pan of perfection.
Then after they’ve cooled and chilled in the fridge, you can cut these super sweet brownies into squares to share because they are rich. So make sure you have some chocolate lovers nearby to help you out.

Kit Kat Cream Cheese Brownies

Servings: 24 brownies

Ingredients

  • 3/4 cup all purpose flour
  • 1/2 cup unsweetened cocoa powder
  • 1/4 teaspoon salt
  • 1/2 teaspoon baking powder
  • 3/4 cup butter
  • 1 1/2 cups sugar
  • 3 eggs
  • 2 teaspoons vanilla
  • Kit Kat bars (4 full-size packages)

Cream Cheese Topping

  • 8 oz package cream cheese, softened
  • 2 eggs, room temperature
  • 16 oz package confectioners sugar
  • 1 teaspoon vanilla

Instructions

  1. Preheat oven to 350 degrees and grease a 13 X 9 pan.
  2. Sift flour, cocoa, salt and baking powder in a medium bowl and set aside.
  3. Melt butter in the microwave in a large plastic bowl.
  4. Stir in sugar. Then stir in eggs and add vanilla until mixed.
  5. Next add the dry ingredients. Stir until combined about 50 strokes.
  6. Pour into prepared pan. Gently press 16 individual Kit Kat bars on top of the brownie batter.
  7. To make the topping, beat cream cheese with a mixer until smooth. Beat in eggs one at a time and mix until combined.
  8. Gradually add confectioners sugar and then vanilla and mix until smooth. Pour on top of brownie batter and Kit Kats.
  9. Bake for 55-60 minutes. The top will turn golden brown. You can place a sheet of aluminum foil on top of the pan for the last 10-15 minutes if the top starts to get to dark and the brownies aren’t done.
  10. Remove from oven and cool completely. Then chill in the refrigerator for a few hours or overnight before serving.

Eat Your Carrots


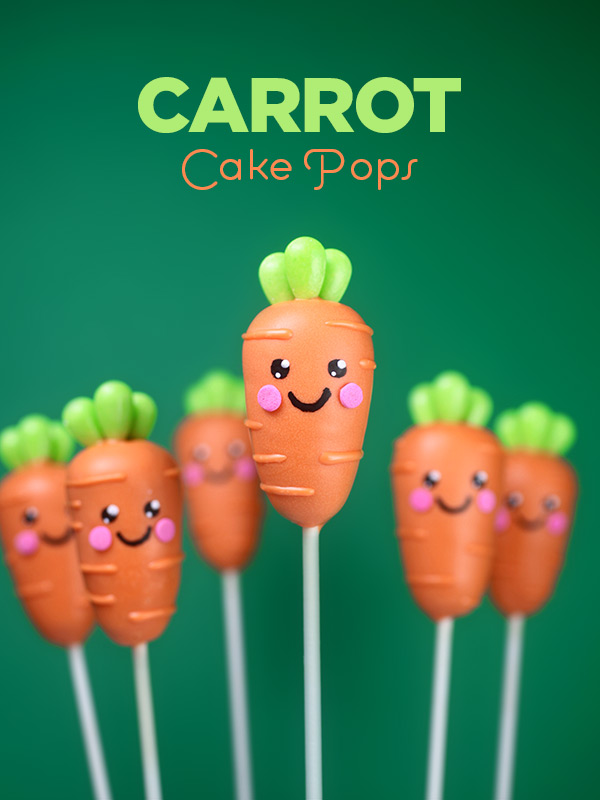
Carrot Cake Pops
Okay, so this isn’t really a hard sell. I mean let’s face it … cake dressed up as cute baby carrots is way more fun than the real vegetable version, right?!
I think so. But, I guess I could start drawing faces on raw carrots to make me want to eat them more. Maybe. One day.
But first… let’s hop all over these carrot cake pops. !
this is another decoration for cake pops .using your mind and playing with dough you can come up with new baking ideas. this what we can sell and gift our friends on different occasion its best to make things by our own hands rather then buying them from market this also show the gesture of love from the bottom of ur heart,
crumbling
Okay, these would have been a little more in line with the theme if I actually made carrot cake and cream cheese frosting.
But I didn’t. No carrots in the house ; )
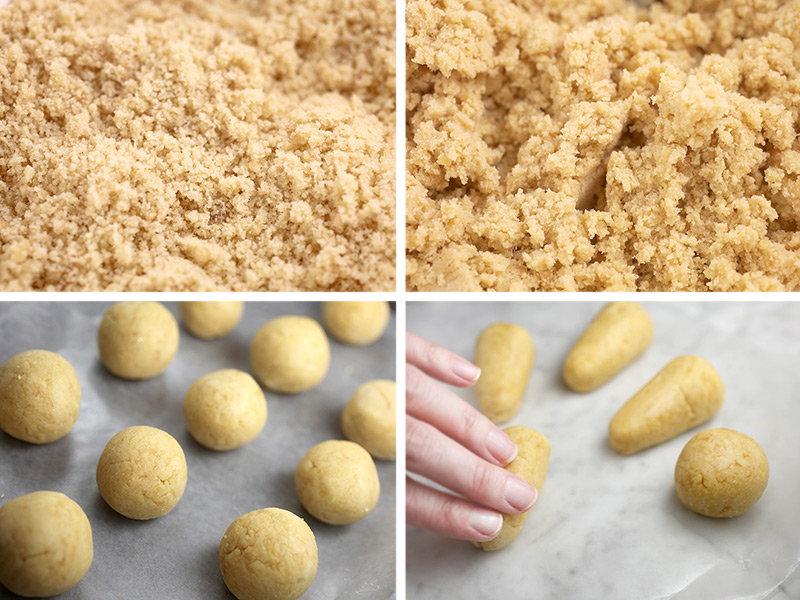
Instead I just baked a yellow cake, crumbled it and mixed with frosting.
Here’s basic instructions for making round cake pops. To shape them into carrots, use wax paper to aid in shaping. You can slide, rock and roll your cake balls on wax paper to shape and create a smooth surface.
dipping
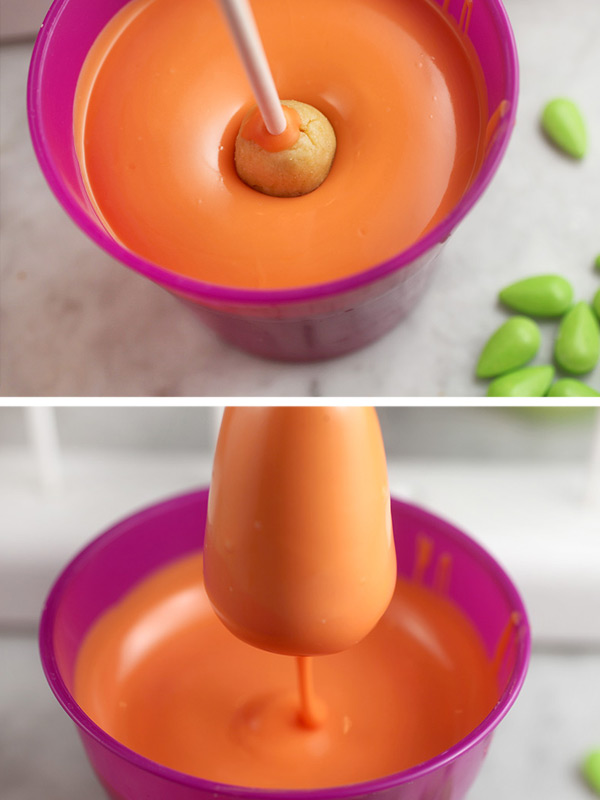
And then after you’ve chilled them for a bit, you can dip them in melted orange candy wafers.
Dip and remove in one easy motion and without swirling in the melted candy. Make sure the coating is nice and fluid when you dip and then remove and tap off any excess for a smooth surface.
And before the coating sets, insert the leaves right on top.
Teardrop Candies
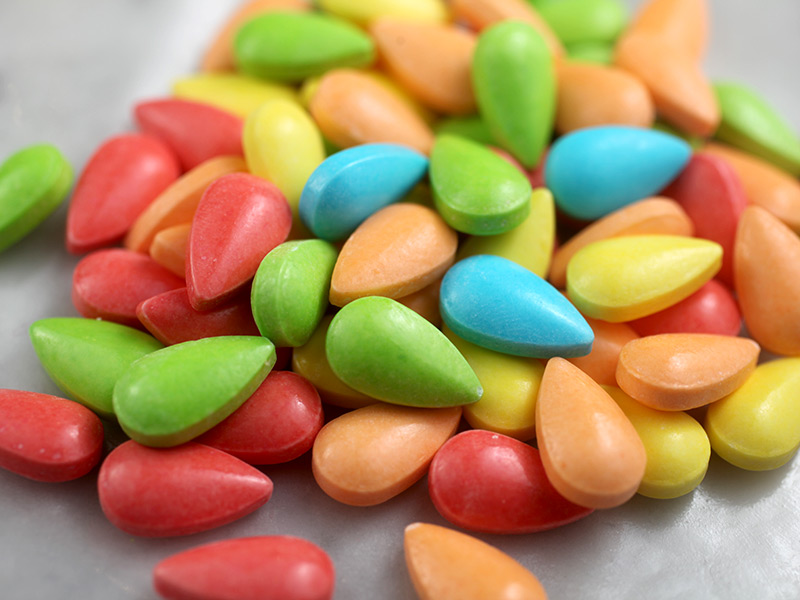
I had these teardrop candies and thought they would be the perfect shape, size and color for the leaves.
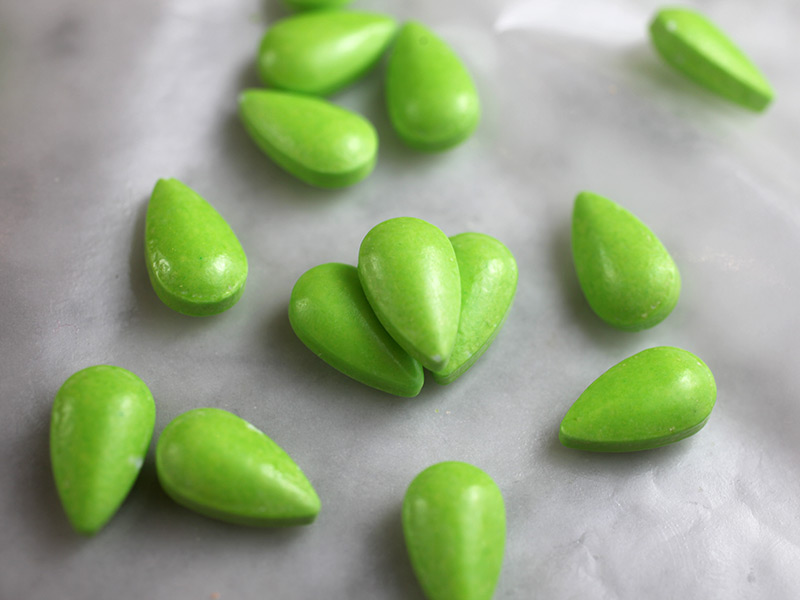
Green Teardrop Candies
And they were. Just insert two candies side by side and then a third candy right in front before the candy coating sets.
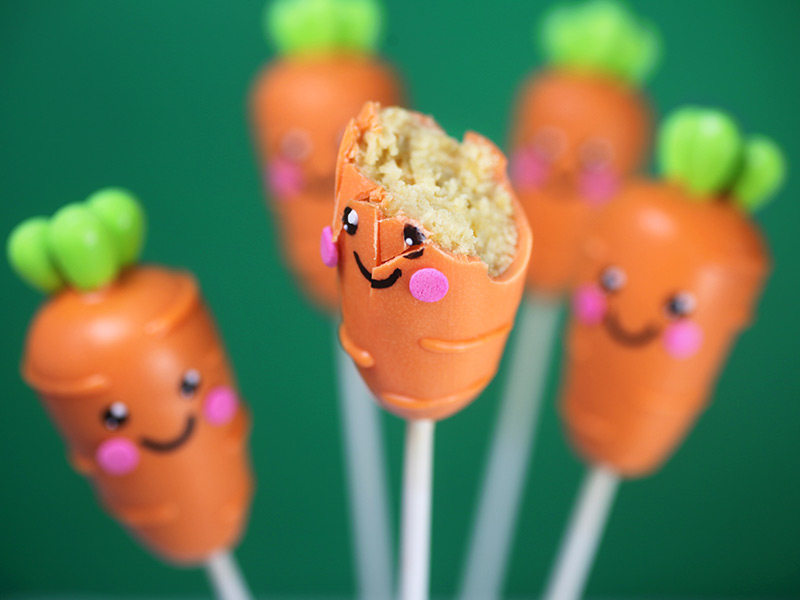
Carrot Cake Pop
Voila … carrots. And cute carrots at that with sweet, simpe faces.
Use an Americolor Gourmet Writing pen to draw on the eyes and mouths.
Carrot Cake Pop
But to make the eyes pop, dot on a little white coating on each eye … it really makes a difference and gives them more personality.
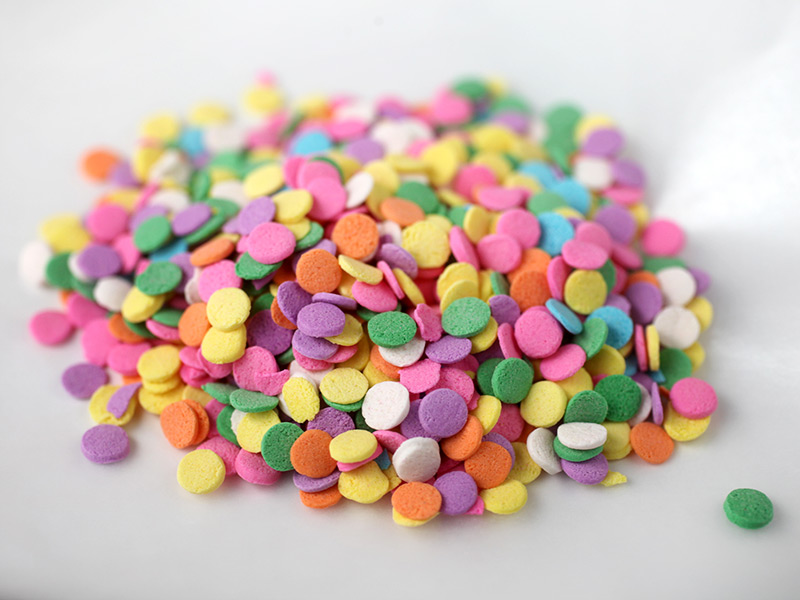
Confetti Sprinkles
For sweet cheeks, use pastel confetti sprinkles in pink and attach them to the pop using a toothpick dipped in coating.
Carrot Cake Pops
See… super cute. But let’s add a little more detail.
Carrot Cake Pops
You can also use a toothpick dipped in coating to draw horizontal lines on the carrots.
Now … They look good enough to eat!
Bunny Carrot Cake Pops
But this guy tried to go in disguise and hide from any hungry bunnies.
Carrot Cake Pops
enjoy it friends and keep me updated wat u want more

Quick and Easy Creepy Cupcakes


Easy Creepy Cupcakes
this is another decoration of cupcakes an idea how u can e more creative just by dong a little bit of effort u can rock the whole idea. you can design different cupcakes for different themes related to different occasions. this cupcake decoration goes with Halloween theme. you can make these and scare your friends in a different way
And it’s pretty easy to boot. There’s hardly any decorating, so you can whip them up super last minute.
Chocolate Cupcakes
Just bake up your favorite cupcakes. I used this easy chocolate cupcake recipe.
Orange frosting
You’ll totally need some frosting, too. Color it orange, purple, black, green or just leave it white.
Plastic Spiders
And then you’ll need the creepiest plastic spiders you can find.
Creepy
I like these long-legged little guys a lot. Eeek!
I’ve been dying to use them on something since I bought them a while ago. Of course, Halloween cupcakes were perfect.
Unfortunately, I have no memory of where I picked them up, but if you’re looking for some plastic spiders – start with dollar stores or craft stores. Or any of those pop-up Halloween shops. They’d probably have something.
Chocolate cupcakes
Now you can make your cupcakes super easy by just frosting them with one color.
Spider Cupcake
And perching your creepy spider right on top.
I think they’d look pretty sharp in solid white frosting, too.
Easy Creepy Spiders
But I wanted them a little snazzier – so I made them with white sugared webs.
Decorating Cupcakes
Reserve some of your frosting before tinting it a color and use it to pipe three circles on top of the cupcake.
Just use a ziploc bag with the corner snipped off to pipe if you don’t have a decorator bag or icing tip.
A. Then drag a toothpick through the icing starting from the center and moving towards the edge of the cupcake to create the web.
or
B. Dip the top of the frosted and piped cupcake in a small bowl of white sanding sugar to coat and then drag a toothpick through. I think this makes them a little prettier and it flattens the web into the frosting so it doesn’t look like it’s sitting on top of it. If you need to adjust the web shape, you can do so easily by nudging the sprinkle coated surface a bit.
Spider Cupcakes
So cute!
I mean, so totally creepy.
I hope you guys have a happy and safe candy-filled Halloween!


Chocolate Chip Cookie Dough Truffles


Cookie Dough Truffles
Chocolate Chip Cookie Dough. Is there anything better? Well, actual chocolate chip cookies would rank right up there I suppose.
But really, how many times have we all eaten raw cookie dough before shoving those babies in the oven to bake? I know I have. Risking raw eggs with every bite. this is far too yummy and tasty. a bit technical but once u get use to it u will love it friends

Cookie Dough Truffle Ingredients
All you need is flour, sugar, brown sugar, salt, butter, milk, vanilla and chocolate chips.
Chocolate Chip Cookie Dough
No egg and all safe to eat by the spoonful. (See note in recipe about raw flour) And you might want to do just that because it’s so good.
Cookie Dough Truffles
Or you can make truffles. Use a 1-inch scoop for even amounts of dough.
I got more than 30 from the recipe but I can’t say exactly how many because, well I may have eaten some first. You know how cookie dough goes.
Cookie Dough Truffles
After you scoop them, roll them into round balls like the third one up from the bottom right. Yeah. I forgot to take a picture of them all rolled.
Then freeze them so they’ll be firm enough to dip.
Cookie Dough Truffles
You can use popsicle sticks to dip them in candy coating and then just sprinkle with tiny sprinkles. Smaller sprinkles are better for these because of the size of the truffles. And of course you can always just leave them stickless too.
Chocolate Sprinkles
I used these Dark Chocolate Decoratifs from India Tree for the first time and I love them. They are tiny, delicate squares of chocolate and they will need to cover some cupcakes soon too. Really soon.
Cookie Dough Truffles
Try writing on the popsicle sticks for an added touch. These would be cute on display for a party.
If the chocolate starts to pool too much at the bottom after you dip, here’s what I do to help them look pretty.
It can be messy, but effective.
Dipping Cookie Dough Truffles
Dip the ball in candy coating…
Cookie Dough Truffles
… and dot or slide the bottom of the coated ball on wax paper to pull off some of the excess coating.
Then just add sprinkles and set it over to the side in a clean spot on the wax paper to dry. Easy peasy and it makes them pretty.
Cookie Dough Truffles
They’ll taste the same no matter what they look like though, so now worries. Except for how many you’ll want to eat. These are pretty addictive little treats.
So… I dipped about half the balls in chocolate coating but about halfway through I had another idea.
Cookie Dough Truffles
It started with flattening the balls into little patties (the less perfect the better) and then freezing them for dipping.
Dipping into peanut butter coating for color this time. Sound interesting?
Can you see where I’m going?
Cookie Dough Truffles
You guessed it.
Chocolate chip cookie decorated chocolate chip cookie dough pops.
I just couldn’t resist.
Chocolate Chip Cookie Dough Truffles
Too too cute.
Chocolate Chip Cookie Dough Truffles
from The Cookie Dough Lover’s Cookbook (Thanks Lindsay!)
1/2 cup (1 stick) unsalted butter, room temperature
1/4 cup granulated sugar
1/2 cup packed light brown sugar
2 tablespoons milk
1/2 teaspoon vanilla
1 1/4 cups all purpose flour
1/2 teaspoon salt
1/2 cup mini chocolate chips
chocolate candy coating
popsicle sticks, cut in half (use kitchen scissors to make a clean, smooth cut)
  • In a large bowl, beat butter and sugars with an electric mixer until light and fluffy (about 3 minutes).
  • Mix in milk and vanilla.
  • Add flour and salt and mix on low until combined.
  • Stir in chocolate chips.
  • Chill dough in refrigerator for about 30 minutes until firm enough to roll or scoop into 1-inch balls.
  • Place rolled balls on a wax paper lined baking sheet and place in the freezer for at least 15 minutes. (I had mine in for about an hour so longer is okay, too)
  • Melt candy coating following instructions on the package. Remove a couple of balls from the freezer at a time and insert the cut stick into the ball. Dip in candy coating and let any excess fall off back into the bowl.
  • Add small sprinkles on top and place on wax paper to set. If the chocolate pools at the bottom of the ball, dot the balls on the wax paper until most of it is pulled off the ball and then place it on a clean spot of the wax paper to set.
  • Refrigerate in an airtight container for up to a week.
If decorating like chocolate chip cookies, flatten the balls into patties and freeze for dipping. Insert the stick carefully into the thickness of the patty and dip in melted peanut butter candy coating. Then just sprinkle with more mini chocolate chips before the coating sets.